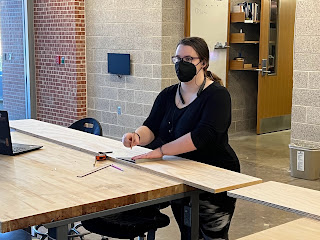
Project 1: Building with Hand Tools. By Alicia Brechin
On day one of the project, we were to watch a Fusion 360 tutorial about how to make the example tote. After watching this video, I rewatched and attempted a practice tote to ensure I followed the techniques and knew what was required of me. I then drew some concepts of the tote I wanted to create that would be useful. After creating a concept design, I went back into Fusion 360 to start on a 3D model. This modeling took several days since I decided to edit the design and incorporate a sketchbook holder in the tower handle of the tote.
Once I had the design I wanted, I worked on the measurements and all the pieces incorporated into the design. Then using these measurements, I marked and cut the pieces out using the chop saw and the bandsaw.
Once the pieces were cut, I could begin assembling the tote. During this stage, I realized that I had not taken the .75 in thickness into account with the measurements, so as I put pieces together, they either didn't make the squares I wanted or weren't the size I wanted. Because of this, I needed to re-measure and cut, and also trim several pieces, specifically the box sides and the sketchbook,
While putting my tote together, I also adjusted the design to fit the pieces I cut. The size of my box became smaller, and I removed one of the cup-like pieces so that there were only 3 cups. When I finally had all the pieces attached to their separate sections, I placed everything in the box and made the final attachments. This took around 4 days since I started with the smaller pieces, such as assembling each of the cups, the box, the sketchbook holder, the lid and handle, and the locking mechanism separately before putting everything together.
I had a lot of fun on this project and learned a lot about making locks and how to calculate the measurement of each piece in the project. I struggled most in this project with how to clamp cup pieces to the table so I could easily attach the screws. However, I was able to ask and get help in figuring out this problem which made it easier to manage. The sander was the scariest tool for me to use since I had only ever used hand sanders before this. The power of the sander surprised me and honestly made me more scared, but after receiving some help and guidance, the benefits outweighed the scariness of the tool. Throughout this process, I was able to learn a lot of lessons. Specifically, I have skills from my art background in modeling and designing tools/objects, while the building process is more challenging than I imagined. Making sure I had all the elements and their measurements and then making sure they lined up the way I wanted them to was a struggle that taught me a lot. This lesson also taught me patience and that the setup before the building process would take the longest. The second lesson that stuck with me the most is to be flexible and always take the thickness of the material into account when measuring. At every step of the project I learned new things and gained patience and flexibility as the concept-to-reality process took place. Next time I know to have patience with my project, block out time for measuring, and make sure to account for the thickness of pieces when calculating measurements. Overall this project taught me a lot, and I am excited to learn more in the next project.
Until then, Alicia Brechin 2/9/2023


Comments
Post a Comment